ATTENTION, READERS in the 28 EUROPEAN VAT COUNTRIES: Because of the new VAT law, you probably can't order books direct from my site now. But that's okay -- just go to my Smashwords author page.
You can order PDFs (as well as all the other ebook formats) from there.
Showing posts with label teachers. Show all posts

Sunday, July 1, 2018

Jim Flick on Execution VS Understanding (Plus a Video)

This post is about more than golf. That's why it's so long. But if you stick with me till the end, you might be surprised at what sort of new "tools" are at your command.

The late Jim Flick worked with a lot of amateur players as well as pros. In fact, he and Jack Nicklaus ran golf schools together. So why was he so successful as a teacher?

This short section comes from his book On Golf, and it sums up why so many people struggle to get better at the game.

DON'T CONFUSE THE INABILITY TO EXECUTE
WITH THE INABILITY TO UNDERSTAND

Every now and then, someone in a school session will say, "Well, I don't understand that."

My usual answer, unless I'm having a bad day and realize I'm being particularly obtuse, is what Peter Kostis, an old colleague of the Golf Digest schools, used to say: "Don't confuse the inability to execute with the inability to understand."

And I go on: "You understand the material very well. Right now you haven't done it often enough that you can execute it. So don't try to get more material. Spend more time on execution."

I'm not trying to be harsh. I'm trying to be realistic. You learn golf the way you learn everything else: step by step. Get too much all at once and you break down from information overload.

Let's say you're a grown-up and you decide to study French. Do you go to school for a semester and then one day wake up speaking the language perfectly? No! You practice, you absorb, you learn in stages. Golf is exactly like learning a language: there's a huge gap between intellectual understanding and physical feel. You bridge that gap with repeated execution. In other words, practice. [p44]
You don't have to learn everything about golf all at once. You don't have to learn to hit the ball both long and straight at the same time. You don't have to learn to hit both fades and draws all at once. You don't have to learn to hit both high and low shots right from the start.

Pick one basic skill. Find a drill or two that will help you get better at that skill. And then work on that skill. You'll get better.

When you go out to play a round of golf, use that skill as much as you can. Did your ball end up in a very tight lie but you can't hit the ball well enough yet to go at the green? Then don't try. Use your putter to advance the ball into a lie you can hit from, even if that's just ten feet away. Or don't try to hit it at all -- pick it up, carry to a spot you CAN hit from, and hit the ball from there.

Don't worry about your score. Just get better at that skill.

Or, to put it in Flick's language example, if you're learning basic words, you don't worry about creating syntactically correct sentences. You just focus on making your limited vocabulary understood. You use gestures -- like pointing at signs or acting things out -- to get your point across, and you don't worry about what you don't know.

THAT'S a good way to approach your golf game. And realize that the sooner you get this one skill down, the sooner you can start working on the next one and the quicker your game will get better.

In other words, folks, be patient with yourselves.

Unlike other posts I do with videos, this one doesn't have a golf instruction video. Rather, it's a video about how to learn new skills. I think it might be eye-opening for you.

I know you've heard people say you have to do a thing for 10,000 hours -- roughly five years of 40-hour workweeks -- to become an expert at it. BUT HERE'S THE TRICK: You don't have to become an expert at something to be very good at it, and you don't need 10,000 hours to become skilled. This video from Josh Kaufman shows why it only takes 20 hours to start developing a sound skill base in a new area. The key is to focus on the important skills at the start.

This video really opened my eyes when I saw it -- primarily because I realized that I had picked up a large number of skills in my life by doing exactly what he says!


So try approaching your golf -- and anything else you want to learn -- using Kaufman's mindset. And since I've been harping on it all week, let me suggest you begin this approach using the L-to-L swing drill as a starting place. It's easy to grasp and it builds basic skills you use in pretty much every part of your game.

And if you try to learn other things by using this mental approach, you might do more than just improve your golf. It might lead you in all kinds of exciting directions!

Tuesday, December 19, 2017

Bobby Jones on How Your Form Affects Your Swing

Since this is Christmas week and most of us are too busy for long posts, I plan to post a quote each day from a famous player or teacher. When you have a moment, this bite-size chunk of instruction will give you something to think about.

Today it's from Bobby Jones.


From Bobby Jones on Golf, from an article called How Form Affects Swinging:
The man with a faulty swing ties himself up so that a smooth stroke becomes impossible. The expert swings smoothly because his successive positions are easy and comfortable, and are such that the movement from one to the other is not hampered by unwilling muscles. The average golfer does not swing smoothly because at some stage he creates a condition that makes it easier for him to move in the wrong direction than in the right one. [p14]
This is a different approach than most players take. We tend to think that it's hard to make a good swing because our natural movements are wrong. Jones says that "unwilling muscles" are the problem... and if a muscle is unwilling to move a certain way, that sounds more like an UNnatural movement, doesn't it?

In other words, Jones says we have trouble swinging because we try to move in a way that ISN'T natural for us.

If we're having a lot of trouble swinging well, perhaps we should reconsider the swing we're trying to make. Perhaps it isn't the swing best suited to our body!

Tuesday, December 5, 2017

A Short Game Tip from Bill Harmon

Golf Digest has a new article with some thoughts from instructor Bill Harmon about Tiger's game at the Hero. And he had a short game tip that I found very informative.

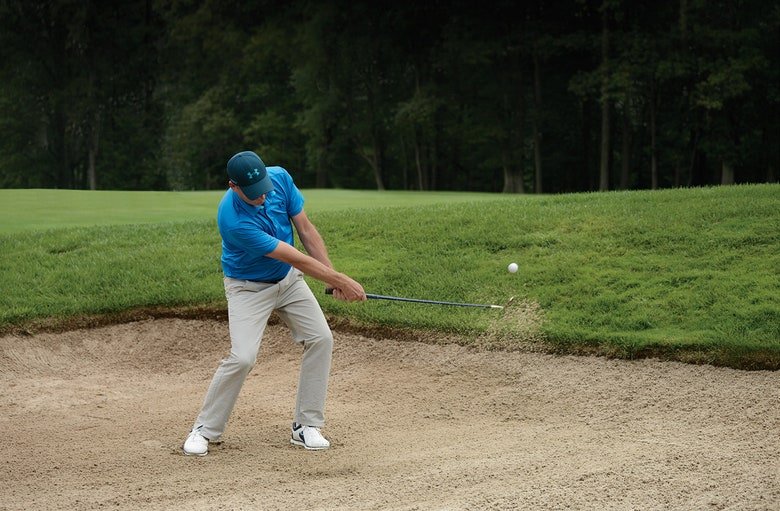
Tiger from the bunker

There was a lot of talk about Tiger's chipping last week, and much of it was a debate over whether his occasional problems were the result of yips. Harmon says no, it's bad technique where his club shaft had too much forward lean at impact.

We've all heard this before, right? But Harmon provided a simple drill to help get things back in sync:
If you tend to dig the leading edge in behind the ball on basic short game shots, narrow your stance and practice taking the club back halfway and coming to a complete stop. Then, without manipulating your hands to change the plane of your swing or making a big lateral shift, let the clubhead swing down to the ball. If it makes contact behind the ball, it usually means you're pulling the club behind you too much on the backswing.
Pay close attention to that last sentence. Pulling the club too much to the inside during your takeaway causes your downswing to come into the impact zone on a very flat angle. In high rough, that means you'll get a lot of grass between the ball and the clubface. On a tighter lie, the clubhead gets very close to the ground much sooner in the downswing, which will cause you to hit the ground sooner.

And in both cases, the shaft will be leaning toward the target when you contact the ball. You want the shaft to be nearly vertical at impact, in order to use the bounce on the club's sole.

Narrowing your stance helps you stay more stable over the shot, so you don't move forward as much at impact. That forward movement just gets your hands farther ahead of the clubhead, which makes the digging worse. And stopping your backswing completely helps eliminate any compensations you might be using that further flatten your downswing.

It's a simple drill to help simplify your chipping motion. And the simpler it is, the more likely you are to make a good chip.

Friday, November 24, 2017

Shanshan Feng's Change of Direction (Video)

This Morning Drive video comes from just before the CME Group Tour Championship. Travis Fulton talks about how Shanshan hits the ball so accurately.

Many of you are trying to get that "reroute" move he mentions, but you're having trouble. Let's see if I can't help you out.


First, let's get one thing straight. Travis says Shanshan doesn't hit the ball very far. Shanshan is 5'7" tall and drives the ball 250 yards on average. Admit it -- most of you, even you men out there, would kill to consistently drive the ball 250 yards AND hit the fairway 81% of the time. (Yes, that's from her LPGA stats page.) I'm REALLY getting tired of TV teachers acting like you have to hit the ball 300 yards or you're "short." And given that she beat the "long ballers" THREE TIMES in 2017, length might be a bit overrated.

Alright, rant over. Let's get to that downswing move...

If you check out the video around the 1:09 mark, you'll see Travis has stopped her swing where her lead arm is parallel to the ground. He points out that the club is moving more vertically for her than for most players... but he doesn't tell you why.

I want you to look at her elbows. See how you can draw a straight line along her lead arm and it will cross her trailing elbow as well? That's because she's doing something many great players (like Annika) do -- during her backswing she's trying to push the handle of the club as far from her trailing shoulder as she can for as long as she can. As a result, she's keeping both arms relatively straight for a long time.

Now you don't want to get tense while doing this. As you can see, her trailing elbow is still bent a bit at that 1:09 position. Your trailing elbow is going to bend some as you turn. But you don't want it to be a BIG bend. Rather, you just want it to flex a bit as you swing up. That's the reason her club swings on a more upright path -- with both elbows fairly straight, her wrists hinge upward in a more upright plane. It just happens that way.

Then Travis stops it again at around 1:25 in the video, just after she starts down. He's talking about how she "shallows out the club." But take a good look at that freeze frame. Surprise! Her trailing elbow is now a bit lower than her lead arm! That's why the club is now on a shallower plane. When her trailing elbow bends, her trailing hand pulls the club a bit sideways and it rotates her lead arm at the shoulder joint.

Just like the "push away" move on the backswing, you don't need to exaggerate this move. If you just relax your trailing elbow a bit as you start down, you'll create that slight shallowing move naturally. In addition, it will increase your wrist cock a little at the top so you don't straighten your wrists out too soon in your downswing.

This is something you'll have to practice, simply because your tendency will be to bend your trailing elbow too much. It doesn't take all that much movement at your elbow to get a big movement at the clubhead. Just start off by swinging a bit more slowly to get the feel for that slight relaxation at the top that will shallow out the club shaft, then gradually speed up to your normal speed.

Sunday, November 19, 2017

Jason Sedan's Lob Shot Drill (Video)

Lob shots give most weekend players (and some pros!) more problems than they should. To help us all out, instructor Jason Sedan filmed this simple drill for practicing lob shots.


Note Jason's starting position. His stance is slightly open and the ball is located -- more or less -- opposite his lead instep. You can get a good visual on that position from the video; I just want to call it to your attention so you WILL notice it!

To "balance" this position -- so you don't hit the ball thin -- Jason sets up with a bit more weight on his lead foot. Again, take a good look at the video. Basically he sets up with his lead shoulder slightly ahead of the ball position BUT the shaft of the club is aimed at his belly button.

Note also that he says NOTHING about opening the clubface! Although he says nothing, if you hold the wedge as he shows in the video, with the shaft leaning slightly backward away from the target, the toe of the wedge might be a bit up in the air. It depends on exactly how YOU address the ball. You may find that you need to open the wedge slightly, or you might not need to at all. Start with the face square and adjust if necessary.

From there it's just a matter of keeping your weight over your lead foot. No moving away from the target during your backswing! This isn't a power shot so there's no need to move -- you can create enough speed with just your shoulder turn and arm swing.

I like this video because it's a super simple way to practice lob shots. Once you've got this down from a standard lie, you can start practicing those Mickelson tricks you've been dying to try.

Thursday, November 16, 2017

The Exciting World of Exaggerated Teachings

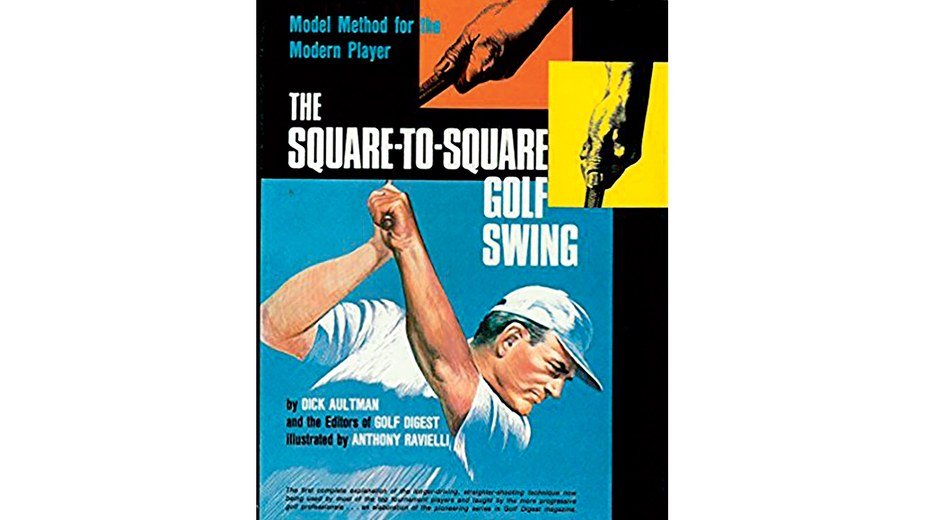
The Square-to-Square Golf Swing coverGolf Digest has published an intriguing article at their website called Is This the Worst Golf Instruction Book of All Time? with the subtitle We should know—we published it. That book was called The Square-to-Square Golf Swing and it was written by Dick Aultman. It was based on concepts espoused by Jim Flick -- yes, THAT Jim Flick -- and Flick became a major proponent of the method. The article follows the history of the rise and fall of the method.
Eventually Flick disassociated himself from it because it embarrassed him so badly. Even good teachers make mistakes!

I think this article can really help you understand why golf instruction is often so complex... and why such problems aren't limited to just one method.

In fact, the problems are typically just exaggerations of standard golf teachings. The swings have been designed to eliminate specific problems that golfers face, but they create other problems that have the unintended effect of complicating the swing. Most often the method requires an unusual amount of strength to do it consistently.

About halfway through the article, Golf Digest has performed a great service by listing a number of method books that, while they are great for certain players, tend to overcomplicate the swing for most golfers. I'm going to summarize the main ones they list, but you'll want to read the article to get the whole story.
  • Hogan's Five Lessons: To quote the article, "...it has been a disaster for anyone who lacks Hogan's need for an anti-hook swing..." I've mentioned this often in this blog because it's my biggest criticism of Hogan -- if you don't already have a duck hook, you have to develop one or you'll slice the ball off the face of the earth. There's a lot of good in Hogan's book and I've done many posts focusing on those points, but I've also tried to point the exaggerations out.
  • How to Perfect Your Golf Swing: I've often mentioned Jimmy Ballard because of his focus on connection, but Ballard did overemphasize the move off the ball onto your trail foot in the backswing. Some of my instructor Carl Rabito's recent teaching has used this move as well, but the drills he used to teach me "back in the day" didn't use that move at all. It's easy to get stuck on your trail leg if you get too caught up in this move.
  • The Stack and Tilt Swing: Another book with a lot of good teaching in it, but it can create the opposite error from Ballard. Bennett and Plummer want you to keep your weight more on your lead foot during your swing, which can create a reverse pivot. Sean Foley uses a lot of these principles in his teaching. Again, this doesn't mean he's a bad teacher, but the method can cause problems for a lot of players.
  • Natural Golf: Get a Grip on Your Game: This is one of the books focusing on Moe Norman's techniques. I happen to have this one, so I can tell you that it focuses a bit too much on creating a hammer blow to hit the ball. It can substantially change your fundamentals so, while it's fun to experiment with, it can cause problems with your normal swing if you aren't careful.
  • The Golfing Machine: I believe this is the method Bobby Clampett used, and Bryson DeChambeau is a big believer in it. Golf Digest points out that this method isn't a self-teaching approach, so bear that in mind.
Again, let me repeat: In no way is this a condemnation of these various approaches to the golf swing. It's just a reminder that, as a general rule, NO METHOD IS FOR EVERYBODY. But this article can help you identify where you might have problems if a particular method isn't working for you.

And knowing what causes the problems is the first step to fixing them.

Take some time and read the article. I think you'll be glad you did.

Sunday, November 5, 2017

Randy Chang on Flipping Your Club (Video)

I know you've heard this before, but instructor Randy Chang's suggestion that you make this recovery shot a regular drill is useful -- particularly since he suggests which club to use!


Chang specifically suggests you use a 9-iron because it gives you a wider face to work with when you flip your club. But it's also smart because wedges make it much more likely that you will pull the ball sideways.

In the video you can see that he creates some "loft" by tilting the club so the face points slightly upward. But equally useful is what he DOESN'T mention. Chang makes no setup changes! This drill makes the shot as much like your normal shots as possible.

There's no real trick to this drill, but that's the beauty of it. Make this a regular part of your practice and you may be surprised at how playable this shot is... and how much your comfort with this shot annoys your playing partners!

Sunday, October 29, 2017

Lee Huntley on Getting Loose for Better Drives (Video)

LPGA instructor Lee Huntley has a simple drill you can use on the course before you hit a drive. She calls it "The 5-Swing Miracle."


Basically, you make five normal full swings without any swing thoughts at all -- all you're trying to go is get rid of excess tension. Then you make five more swings "the wrong way" -- that is, reverse your swing. (If you're right-handed, swing left-handed, and vice versa.)

Lee says reversing your grip is optional but it seems to me that it would stretch your muscles better if you did. However, that's up to you.

The idea here is that you balance the tension on both sides of your body, That way, your normal swing should be more of a free-wheeling move and you should hit a better drive.

Granted, it does seem that this should be called "The 10-Swing Miracle." But if it works for you, who cares? A miracle by any other name...

Friday, October 27, 2017

How Visualization Helps on the Beach

Instructor Will Robins has a new Golf Digest article on how to get out of the sand without practice. Sound interesting? Let's check it out.

Will Robins hitting sand from a bunker

How can Robins make such a claim? Because he says your problem with bunkers isn't your technique. Rather, it's your fear of bunkers.

Alright, I'll bite on that. He says that when you're afraid you tense up, and that screws up your technique. If you just relax, your muscles will do what you know to do without a problem. After all, you can hit several inches behind the ball and still get it out of the bunker.

I'd like him to clarify that a bit. You can hit behind the ball and get it out of the bunker as long as there's a lot of sand in the bunker. If you're in a bunker with a thin lie or just hard sand, hitting too much behind the ball results in a skulled shot. Most of the time, that's not going to get you out.

So I think his advice here is good as long as you've got a standard lie in the sand. If there's some sand under the ball, his advice is probably going to help you... and he's right that you won't need much practice to make it work.

Since you can hit as much as three or four inches behind the ball when you've got a standard lie in the bunker, Robins suggests that you forget about the ball. Or to put it another way, since you don't have to hit the ball at all during a normal sand shot, why worry about what the ball does?

Robins wants you to use a visualization image: Throw a handful of sand onto the green with your club. That's it. You can practice your swing in the rough beside the bunker, making a nice swish that doesn't dig into the grass. Then just do that in the bunker, swinging hard enough to throw some sand onto the green.

The ball will just happen to fly out of the bunker as well.

I really like this advice. Rather than directly trying to attack the fear of leaving the ball in the bunker, Robins wants you to do something you KNOW you can do -- swing hard enough to throw some sand onto the green. From a standard lie, you don't even have to be particularly accurate with your entry point behind the ball to get both sand and ball out of the trap and onto the green.

Once you get over your fear of leaving the ball in the bunker -- however long that takes -- then you can worry about those thin lies. (To be honest, you might just try chipping from a thin lie. The ball's going to come out low anyway.)

In the meantime, just sling some sand onto the green. I bet you can do that just fine.

Tuesday, October 24, 2017

Some of Butch Harmon's Biggest Hits

Today I've got a single link for you, but you'll want to read this one. Golf Digest did a fairly long article listing the major swing tips Butch has passed on to his most famous students.

Butch Harmon and Rickie Fowler

This isn't just one or two players. The article includes Butch's work with:
  • Tiger Woods
  • Phil Mickelson
  • Adam Scott
  • Dustin Johnson
  • Greg Norman
  • Rickie Fowler
  • Seve Ballesteros
  • Fred Couples
  • Ernie Els
  • Jimmy Walker
Yeah, that ought to be enough to keep you busy for today! Now you can find out what Butch has worked on with each of his famous pupils, and the variety of problems he helped them with is amazing. It just goes to prove that every golfer is different, and what works for one player won't work for another.

Wednesday, October 18, 2017

Trent Wearner on the Art of Swatting Flies (Video)

If you've read my blog for any period of time, you know I frequently use a flyswatter as my example of how your forearms and wrists work during a swing. Well, instructor Trent Wearner actually posted a video with a flyswatter drill to help you get more clubhead speed. Of course I'm going to post it!


The drill is self-explanatory. I've posted some similar drills before, but actually seeing this move made using a flyswatter with a golf grip may help some of you get a better feel for how the motion works.

The one thing I wish Wearner had done was make a "swatter swing" using both hands so you could see the actual arm motion of each arm. It may help you figure out the motion more easily if you cock your wrists upward directly in front of your body, with the shaft swinging up and down vertically. Both elbows will bend slightly as you change direction -- the bend will feel bigger than it actually is -- and to get the same feel in your normal swing you'll have to make sure you let your shoulders turn fully in your backswing.

You might find that my post called The Wall Slap Drill is useful for transferring the feel of the "swatter swing" to your regular swing.

This really isn't difficult unless you're dead set on tensing your muscles a lot during your golf swing. A flyswatter-style motion feels a lot more relaxed, and consequently a lot more natural, than most players think their swing should feel.

Sunday, October 15, 2017

Trent Wearner on Toe-Down Chipping (Video)

A simple GC video but very informative. Instructor Trent Wearner teaches the basics of toe-down chipping from thick rough.


I was very interested in this because tilting the club up on the toe tends to change your aim. How would he deal with that? I did a walkthrough of his technique and was surprised.

Wearner simply takes a wedge -- he recommends pitching wedge -- and sets up normally, then steps closer to the ball. That automatically gets the club up on the toe. You may need to grip down a bit. (I did.) He says you can use your putting grip if you're so inclined. (I didn't.)

Then you step toward the target a bit to move the ball back in your stance. And that's it -- no adjustment to the face.

What surprised me? I automatically hooded the face a bit, so it looked to be aiming at the pin. I like it when things I desire happen automatically!

I can't promise that you'll make the auto adjustment when you move the ball back, but it appears that Wearner expects that to happen since he says nothing special about it. So try it -- if it works for you, it should simplify many of the tricky chips you face from the rough.

Thursday, October 12, 2017

Dave Pelz on High Pitches (Video)

Yes, I have to post a tip from School of Golf's Wedge Week with Dave Pelz. Here's Dave on how to hit a high pitch with a 60° wedge.


Note how Dave alters his address position. At first he sets up perfectly square to his aim line, with everything -- feet, knees, hips, shoulders -- aligned parallel to a line straight at the pin. The ball is in the center of his stance. That means a line from the ball position running between your heels forms a T with your aim line.

Then he shuffles around counter-clockwise so his stance is open to his aim line and he's aimed left. BIG NOTE HERE: These instructions are for righthanders. IF YOU ARE LEFTHANDED, you will shuffle around clockwise so your stance is open to your aim line but you are aimed right. You got that?

However, one thing remains the same in both cases: The ball position is still in the center of your stance, as it was when you were lined up straight at the hole. The difference is that your T is now OPEN -- it points to the open side of the flag. Then you just rotate the club in your grip so the face once again points STRAIGHT AT THE FLAG. Now when you swing along your foot line, the ball will fly toward the flag, not curve.

How can this be? you ask. Simple -- although the ball is still positioned in the center of your stance, shuffling around had the effect of moving the ball back into the curved area of your swing. The club is actually moving toward the flag when it strikes the ball, even though it won't necessarily look that way to you while you're standing over the ball.

Confused? Don't feel bad. The reason we all have trouble getting our mechanics correct is because we often have trouble understanding how body rotation alters swing path. Just trust Dave here and do what he says. After a bit of practice you'll be happy with the results.

Tuesday, October 3, 2017

Butch Harmon on the Shanks (Video)

Here's a Golf Digest video where Butch Harmon gives a drill for eliminating a shank. You can get that drill from the video. I'm posting this because he explains why you shank.

And it's not for the reason you think.


Here's the deal: You think you're shanking because the clubface is open... but Butch says you've got the clubface CLOSED. When the face closes down, the toe digs into the ground and makes a skinny trench that drags the hosel closer to the ball. And most people try to fix it by closing the clubface even more (because they think the face is open), and that just makes it worse.

To fix a shank, you have to learn how to leave the clubface a bit open at impact, which typically means you hit the ball slightly from the inside. There are a number of drills that will teach you that, Butch is just showing you one way.

But you can't fix a problem if you don't know why you have it. And if you shank the ball, now you know why.

Thursday, September 28, 2017

David Leadbetter on Buried Lies from a Bunker's Upslope

Golf Digest (and David Leadbetter) did an article on how to dig your ball from a plugged lie on an upslope. The article is short but I'll summarize anyway.

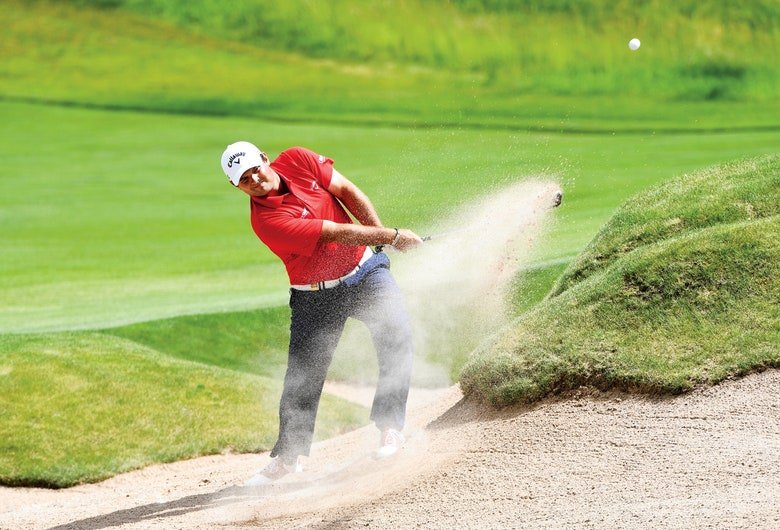
Patrick Reed from the bunker

When you're plugged in a bunker's upslope:
  • Square up the clubface. You don't need to open the face because you'll be swinging up anyway. Plus you want the front edge to dig in since the ball's buried.
  • Set your weight on your lead foot and lean forward a bit. You want to get steady footing on that upslope.
  • Swing aggressively down into the sand. You won't have much of a finish because you're digging into the sand with the front edge.
  • Step down the slope with your lead foot as the club hits the sand. The timing on this one can be a bit tricky, but it helps create more power to get the ball out of the sand. Besides, on some slopes you'll just naturally fall backwards...
You'll need a little practice to get the hang of this, but there aren't any special techniques you have to learn. Unless you count falling backwards without hurting yourself as a technique. ;-)

Saturday, September 9, 2017

Mike Davis on Downhill Lies (Video)

GCA teacher Mike David did a short segment on how to play off a downhill lie that I found very helpful. Of course, I'm going to try and simplify it a bit.


Davis lists five primary keys to making a good shot from a downhill lie:
  1. Tilt your torso with the slope
  2. Widen your stance
  3. Ball position is a bit tricky -- imagine a line rising perpendicular from the ground to the downhill side of your face and put the ball there
  4. Swing easier
  5. No weight shift -- set up with weight on downhill leg
Okay, let's see if we can make these things a bit more instinctive.

Numbers 1, 2 and 5 can be made a bit simpler by combining them and studying the video. When you tilt your torso, you're trying to get your shoulders more in line with the slope. But if we widen our stance and set up with our weight already on our downhill side, we can effectively get these three correct by simply placing our head directly vertical over our lead foot and then moving it ever so slightly to the uphill side. That's simply a balance thing -- we don't want to lose our balance and fall down the hill when we swing! Widening our stance and setting our head almost over our downhill foot automatically creates a spine angle suitable for the slope.

To get the ball position correct (key #3), let's use the address position we just created. Instead of trying to create a line perpendicular to the slope -- we've already created several angles in our address -- let's just place the ball vertically below our UPHILL EAR. If you look at the video, you'll see that's roughly where the ball is... and you can find that place during a practice session simply by dropping a ball held beside your uphill ear and watching to see where it lands.

Finally, instead of trying to change our swing speed (key #4) let's just think of this swing as a big pitch shot. That will keep us from swinging too hard or too long, and we can just make a normal swing from about shoulder height.

Those three keys should help you duplicate the Davis setup from this video without getting too caught up in the angles you're trying to create. Addressing the ball on a downhill slope affects both your balance and your vision, so you might as well make it as simple as you can. This way, you can use gravity to help you create a consistent address position.

All you need is a little time on a slope practicing your setup. You won't need to hit balls at first -- just get familiar with the setup. As Davis says, learning to predict your distance comes with practice.

Sunday, September 3, 2017

Martin Hall on Wrist Putting (Video)

This is an old clip from School of Golf, back when Sara Brown was on the show. In this clip Martin talks about wrist putting and, while it's not exactly the same style as the pop stroke I covered in Ruthless Putting, there's more than one way to wrist putt and Martin does include the primary fundamentals of any basic wrist stroke.


The key fundamental in wrist putting, the fundamental which all effective versions of the technique share, is that the trailing arm stays stationary during the stroke. You can see this in Martin's demonstration around the 2:05 mark.

When you watch him do it, you might be inclined to stroke the club with your lead hand, and that does work for some people. But you'll probably find it easiest to create a square clubface at impact if you use your trailing hand to make the stroke. That's because your quiet trailing arm limits the extra sideways motion that throws the stroke off line.

Also, you'll probably find it easier to keep your stroke on line if you open your stance just slightly. This is something you'll need to experiment with, but it's because your trailing arm is slightly off to your side rather than out in front of your body.

If you don't hit the ball straight, you may need to adjust your ball position. The wrist stroke is so simple that, if the ball is positioned correctly, the ball should roll straight quite consistently.

One last thought: While it's true that you see fewer pros use a wrist stroke these days because the greens are much faster, that doesn't mean the stroke doesn't work on fast greens. It simply means that you must be more relaxed when you stroke the putt, and the pros use drills that focus so much on line and plane that they "freeze up" over the ball.  An effective wrist stroke is a relaxed stroke, and it will work as well on a fast green as a slow one.

Thursday, August 31, 2017

Answering Questions about Swinging (Videos)

A few days back I did a post called Hitting VS Swinging, and Dana left the following questions in the comments:
Mike, can you speak more on the swinger preference and feeling the club pull the hands back. I've been taking lessons from a student of Manuel, and he says 'use the hands to take the clubhead back, then swing the entire club forward.' Also, any youtubes on good swinging motions?
That's a lot to cover in one post, but I'll see if I can at least start clearing up some of the confusion.

I'll start with the last question first. It's really hard to find videos that demonstrate a "historically accurate" swinging motion, because of Ernest Jones. As I noted in that other post, Jones adapted the original classic swing -- which was intended for use with soft hickory shafts -- to stiffer steel shafts. In doing so, he had to drop some of the original techniques that didn't transfer well.

A good example is what many modern teachers call "regripping at the top of the swing." In my copy of the Jones book Swing the Clubhead, on page 33 he specifically says that this is an error that many great golfers did unintentionally. That puts him at odds with Harry Vardon who, in his book The Complete Golfer (which is in public domain here in the US and can be found in several free digital editions at this Project Gutenberg link), not only said that the regripping was on purpose, but told how much movement there was and where to measure it! But Vardon played only hickory and Jones taught his students how to play steel. The "regrip," which really isn't a regrip because those fingers aren't gripping the club -- they actually sense the shaft tension to help you feel what the clubhead is doing -- didn't allow you to load a steel shaft properly. (Don't understand what that means? Check out this post.)

Having said that, the late Manuel de la Torre -- who I have often recommended as an alternative to Hogan for those who requested an option -- based much of his teaching on Jones, and he taught several LPGA major winners. There are some YouTubes of de la Torre, but I have posted one of an old Academy Live show below. I originally posted it at this link, but this will save you some time. Note that, as I noted in my original post, the first five minutes may sound like crazy geometric stuff, but hang in there because there's a lot of good material in this show.


Now, about that "use the hands to take the clubhead back, then swing the entire club forward" comment. I have talked about "flinging the clubhead back" in past posts, which may have added to the confusion. I'm going to try to explain both phrases here, and then I'll call it quits for today.

Here is a video of Harry Vardon I found that illustrates the classic "flinging" motion. I've set it to start at the 1:45 mark (to give you time to close any ads that might appear) where you'll see text that says
The "slowed" view. Note how the hands move back before the head of the club.
If you watch the sequence there closely, you'll see Vardon waggle the club, place the clubhead behind the ball, forward press very slightly, and then the hands will move back noticeably before the clubhead begins to move.


Have you ever heard Gary Player talk about "striking a match" with the clubhead? This is the same movement, only on the backswing. In Player's drill, if you set the club behind the ball and then "strike the match" as you swing to your finish, you'll feel pressure in the back of your trailing wrist. When the clubhead overcomes the friction of touching the ground, it will be flung forward and the motion will feel as if the clubhead is pulling your hands forward.

"Flinging the clubhead back" is the same sort of motion, except you do it on the takeaway and it creates that pressure in the back of your LEAD wrist. When the clubhead starts to overcome the friction of the ground, it is flung backward and feels as if it is pulling your hands upward.

Then, at the change of direction at the top, the pressure will again move to the back of your trailing wrist, just as it did when you "struck the match" earlier. This feeling is caused by the clubhead lagging on the way down as your wrist cock is retained (or whatever terms you want to use to describe it). Your wrists finally start to uncock around halfway down because the increasing speed of the clubhead (acceleration!) starts catching up to the much slower speed of your hands.

In other words, your hands take the clubhead back and then you swing the entire club forward.

This doesn't mean you aren't using your lower body to drive the swing. The laws of physics DEMAND that your swing start from the ground up, both when you start your backswing and when you start your downswing. The problem comes when we start to interfere with the natural motions. Then we create exaggerated motions that overpower the natural motions our bodies are trying to do. And that causes more inconsistency, because we don't overpower the natural motions quite the same way every time. (That's part of the reason pros have to practice so much and yet they still struggle.)

I can hear your protests -- the golf swing ISN'T natural! Well, yes and no. It would be more correct to say that it isn't natural to all of us. Ever wonder why baseball players, quarterbacks and hockey players seem to be much better at the game than the rest of us?

It's all about the shoulder coil. See, most of us never learn what a natural shoulder coil USING BOTH ARMS feels like. Pick up a ball in one hand and throw it overhand. Take a look at yourself in a mirror. I bet your shoulders haven't turned more than maybe 30°, if that. Your hips barely turn at all.

But those three athletes I mentioned, they all learn to coil their shoulders while they hold one object with both hands -- the baseball player swings a bat, the quarterback uses both hands to take the ball up to shoulder height (to secure that large ball in case he gets hit), and the hockey player uses a stick. And the hockey players are typically the best of the three, simply because the hockey stick has a flat surface that they have to learn to control if they want the puck to go where they aim it. So the hockey players are much better with hand/clubface control as well as making a better shoulder coil. These are skills that work for both swingers and hitters, but they really make a swinger into a formidable opponent.

So there you have it. That's sort of a basic course on how the swinging motion works and why some folks are better at it than others. I hope it answers yours and Dana's questions. And as usual, you can drop extra questions in the comments below and I'll try to answer them.

Tuesday, August 29, 2017

Devan Bonebrake's Center Contact Drill (Video)

This "gate drill" from GC's Devan Bonebrake should help you improve your ability to hit the ball in the center of the clubface. But what really caught my attention is his explanation of the drill. That may help you most, no matter what form of "gate" you choose to use at the range.


The idea of setting two "gateposts" on either side of your swing isn't a new one, whether you use two empty ball boxes like Devan suggests, or a couple of 2x4s or just a couple of tees. But what makes his explanation great is that he tells you what hitting the "gateposts" means, even when you don't have a ball between them:
  • If you hit the outside or "far post" -- that is, the one farthest away from you -- that means you hit the ball in the heel of the club.
  • If you hit the inside or "near post" -- that is, the one closest to you -- that means you hit the ball on the toe of the club.
Knowing what your error means is critical to successfully correcting it. Devan's explanation, as simple as it sounds, can dramatically improve your practice because most of us try these drills without truly thinking about what the mistakes mean. Remember: If your club's toe hits the "post," you heeled the shot. If your club's heel hits the "post," you toed the shot.

Thoughtful practice always results in faster improvement.

Saturday, August 19, 2017

Cindy Miller on Squaring the Clubface (Video)

This is a short video from one of GC's coaches this past week, Cindy Miller (who you may also remember from Big Break). I'm posting this because it's a simple explanation of how to square your iron's clubface at setup.


Note that Cindy says to use the two vertical lines to line up the clubface, to set them parallel to the direction you want the ball to go. I would add that you can also use the horizontal lines to square the clubface, pointing them 90° to your target line. Personally, I find that a bit easier to do. You should use the method that works best for you.

But the point here is that you need to set the clubface square at address if you want to return it to square at impact. I know that sounds incredibly simplistic, but it's usually the simple things that mess up our shots.