Yes, I'm on a "tip trip" this week because I don't have any other topic that has grabbed me. So today I'm posting an old Golfweek video featuring Johnny Miller talking about Lee Trevino's signature move.
Miller says that what made Trevino's swing unique was the way he "chased" the clubhead down his aimline, keeping the clubface moving toward his target longer than most players.
But what I want to focus on is how Trevino finished his shots, because it can help you hit a low-trajectory fade. For many of you, this is the "go-to" shot you're looking for when you need help hitting the fairway. Johnny demonstrates this around the 2:00 minute mark in the video.
The key is that, when he finishes his shot, he has shortened the swing slightly and the shaft is leaning toward his target line, almost parallel to his spine. That's a simple concept and, although it may take you a bit of practice to master, it can be a very useful go-to shot when the landing area is tight.
This isn't the kind of shot you're going to hit a super long distance. Go-to shots rarely are. But this is something you can hit with any club in the bag, from almost any lie, and get a playable result. Having a shot like that in your repertoire is a great strategy move that can really save you some strokes.

Showing posts with label trajectory. Show all posts
Showing posts with label trajectory. Show all posts
Sunday, June 3, 2018

Saturday, May 19, 2018
Long Irons VS Hybrids VS Driving Irons (Video)
Well, the video covers part of today's post. The video is a GOLFTEC lesson from GC that explains the difference between long irons and hybrids, as well as why you might want to sub one for the other. The stats about pros in the video are fascinating.
Perhaps the biggest thing to take away from this video is that, even though they have the swing speed to get away with it, a large number of pros carry nothing longer than a 4-iron and that many -- perhaps most -- amateurs are better off with nothing longer than a 5-iron.
And how do you know if you're carrying a long iron that's "too long" for you? Just check the gaps between your clubs. When the gaps become too small, that's where you should probably consider replacing long irons with hybrids.
But this video doesn't address driving irons, which are getting a lot of attention during TV broadcasts lately. For that I went to this post at the GOLFTEC site. It's an older post but it gives us the basics.
Driving irons fit between long irons and hybrids -- more forgiving than the former but not as much as the latter. The driving iron creates a lower trajectory than a hybrid for shots in the wind -- or, as many of the pros are using them for, hitting stinger shots when they can't control their drivers -- while still being easier to hit than those pesky long irons.
Unless you have a high clubhead speed, your best bet for low shots into the wind or for stinger shots is to take a longer, higher-lofted club -- a hybrid or a fairway wood -- and use a three-quarter swing. This will give you the best combination of distance and forgiveness.
Of course, if you have a 120mph swing, you can hit any kind of club you want. But unless you do, hybrids are probably the way to go.
Perhaps the biggest thing to take away from this video is that, even though they have the swing speed to get away with it, a large number of pros carry nothing longer than a 4-iron and that many -- perhaps most -- amateurs are better off with nothing longer than a 5-iron.
And how do you know if you're carrying a long iron that's "too long" for you? Just check the gaps between your clubs. When the gaps become too small, that's where you should probably consider replacing long irons with hybrids.
But this video doesn't address driving irons, which are getting a lot of attention during TV broadcasts lately. For that I went to this post at the GOLFTEC site. It's an older post but it gives us the basics.
Driving irons fit between long irons and hybrids -- more forgiving than the former but not as much as the latter. The driving iron creates a lower trajectory than a hybrid for shots in the wind -- or, as many of the pros are using them for, hitting stinger shots when they can't control their drivers -- while still being easier to hit than those pesky long irons.
Unless you have a high clubhead speed, your best bet for low shots into the wind or for stinger shots is to take a longer, higher-lofted club -- a hybrid or a fairway wood -- and use a three-quarter swing. This will give you the best combination of distance and forgiveness.
Of course, if you have a 120mph swing, you can hit any kind of club you want. But unless you do, hybrids are probably the way to go.
Wednesday, May 9, 2018
Fred Griffin on Iron Shots That Stop Quickly (Video)
GCA coach Fred Griffin shared a feel-oriented approach to hitting a high iron shot that lands softly on the green. It's simpler than many methods you might have heard.
Fred gives you three simple steps.
Make sure you understand the images. If you can imagine how the shot feels, you'll be able to hit it much better than you expect. Never underestimate the value of a good mental image of your shot!
Fred gives you three simple steps.
- Put the ball slightly forward of center in your stance. If you stop the video around the :54 second mark, there's a good ground level image of the ball position. You can see that the ball is still inside your lead heel. You don't want to put the ball too far forward or you'll hit it thin.
- He says to feel as if you "sink" a bit on your backswing, but he just wants you to keep your trailing knee slightly flexed on the way back. You don't want to straighten your trail knee when you make this shot! This gives you a more level approach to the ball, as opposed to (a) raising up and hitting it thin or (b) dropping during your downswing and hitting it low.
- And then there's that "waiter's tray" image. He wants you to swing to a high finish, and that's a good image to help you straighten up as you finish your swing. Yes, if you stayed level during your downswing, you'll be using the ground here!
Make sure you understand the images. If you can imagine how the shot feels, you'll be able to hit it much better than you expect. Never underestimate the value of a good mental image of your shot!
Sunday, May 6, 2018
A Golf Lesson Among Friends (Video)
In case you missed it, here's Jack Nicklaus helping Gary Player get some height on his shots before they tee off at the Insperity Invitational Greats of Golf competition. The video is nearly 15 minutes long but you only need to see the first 1:30.
This is a great discussion between two legends who understand their swings. Listen to Jack talk about how, if you swing to the inside with your takeaway like Bobby Jones did, you have to swing back out -- that is, your downswing path is above your backswing path. That's a loop. And if you don't, you'll tend to get stuck and lose speed and height. Gary is swinging inside but not back out -- he says as much.
Listen to Gary talk about the difference in the width of their backswings. Jack had an upright swing with a one-piece takeaway -- which is very wide -- but Gary couldn't do that because, with his flatter swing, he tended to lay the club off at the top. (That means he points the club too much behind him, rather than toward the target.)
Jack talks about how his swing plane was so upright because he had such a huge shoulder turn. And he helps Gary widen his takeaway without making a more upright swing, which would cause that "lay off" move at the top for him.
That 1:30 is worth listening to several times, simply because you can learn so much about how the various parts of the golf swing work together to create the trajectory of a shot. Great stuff from the legends!
This is a great discussion between two legends who understand their swings. Listen to Jack talk about how, if you swing to the inside with your takeaway like Bobby Jones did, you have to swing back out -- that is, your downswing path is above your backswing path. That's a loop. And if you don't, you'll tend to get stuck and lose speed and height. Gary is swinging inside but not back out -- he says as much.
Listen to Gary talk about the difference in the width of their backswings. Jack had an upright swing with a one-piece takeaway -- which is very wide -- but Gary couldn't do that because, with his flatter swing, he tended to lay the club off at the top. (That means he points the club too much behind him, rather than toward the target.)
Jack talks about how his swing plane was so upright because he had such a huge shoulder turn. And he helps Gary widen his takeaway without making a more upright swing, which would cause that "lay off" move at the top for him.
That 1:30 is worth listening to several times, simply because you can learn so much about how the various parts of the golf swing work together to create the trajectory of a shot. Great stuff from the legends!
Saturday, March 31, 2018
Raymond Floyd on Feeling the Target
With all the talk about mental mistakes at the LPGA and PGA Tour events on Friday, I thought it might be worthwhile to look at what Raymond Floyd had to say about the mental game. In his book The Elements of Scoring he has an entire chapter called Let Your Mind Feel the Target that deals with this topic.
Obviously I can't quote an entire chapter! But there are a couple of things he says that I think you could use immediately in your own golf games.
To begin with, he says that we may have the wrong idea about what it means to "play with feel." While it does involve what you feel with your hands to some degree, Floyd says he thinks you use your eyes to play with feel. Things like recognizing shot shapes, improvising swings in tough situations, and such are based on things you see, not things you can touch. He believes this is why so many pros have begun using mental coaches —you need to get out of your own way and give your mind more freedom, more trust to make the right decisions.
Then he says this about what we commonly call "target golf":
And I'm not even sure he's talking about visualization here. I haven't thrown any spears that I can remember, but I have thrown baseballs and discs and hit a few tennis shots and made a few free throws on a basketball court. I can't say that I actually visualize those actions. Rather, I identify my target and anything that might be in the way that I have to avoid, and then I just think about hitting my target. There must be some visualizing in there — I'm seeing things I have to avoid, after all — but it's not a conscious act. I just notice them.
I suspect that's part of why so many of us have trouble with target golf. We try to see lines curving through the sky and other things like that. But that may have the same effect as too many words. Perhaps we just need to "see and do." That certainly sounds like what Floyd is suggesting.
Here's an idea: Next time you need to play a shot — say, a low shot — just try swinging the club at an imaginary ball and imagine the ball coming off the face low when you swing. I bet your hands and arms will adjust to create the shot. If you then try to duplicate that shot without an undue amount of thought, you might pull it off. Maybe not the first time, because learning to play by feel comes from practice. But you might be more successful than you expect.
No lines curving through space, no elaborate body positioning. Just pretend you're Bubba. Playing that game on the range might teach you some new things about shotmaking.
Obviously I can't quote an entire chapter! But there are a couple of things he says that I think you could use immediately in your own golf games.
To begin with, he says that we may have the wrong idea about what it means to "play with feel." While it does involve what you feel with your hands to some degree, Floyd says he thinks you use your eyes to play with feel. Things like recognizing shot shapes, improvising swings in tough situations, and such are based on things you see, not things you can touch. He believes this is why so many pros have begun using mental coaches —you need to get out of your own way and give your mind more freedom, more trust to make the right decisions.
Then he says this about what we commonly call "target golf":
As a scorer, your goal on the course should be to just play golf. Even though golf is a slow game that allows plenty of time to think, from the moment you begin your pre-shot routine, you want a clear mind that is thinking only of the simple task at hand, which is to hit the ball to the target. In this state, the body is relaxed, and the focus is strictly on where — not how — you want to hit the ball. Imagine a very hungry caveman throwing a spear at his prey. I seriously doubt he had any thoughts about his release point or how high to carry his right elbow. I'll bet he was thinkingNote what he says: "I'm not saying golf should be played with a blank mind. Far from it." Clearing your mind isn't about playing thoughtless golf. But instead of filling your mind with lots and lots of words about how you should do this and how you should do that, you want to fill your mind with a clear picture of what you're trying to do.
LET YOUR MIND FEEL THE TARGET
about precisely where he had to throw that spear. If he wasn't "out of his own way," he didn't eat.
I'm not saying golf should be played with a blank mind. Far from it. But rather than having many scattered thoughts, you should have one very focused one. A scorer has control of what he chooses to think of on the golf course. He knows that to a large extent, he is only as good as his thoughts. [p141-142]
And I'm not even sure he's talking about visualization here. I haven't thrown any spears that I can remember, but I have thrown baseballs and discs and hit a few tennis shots and made a few free throws on a basketball court. I can't say that I actually visualize those actions. Rather, I identify my target and anything that might be in the way that I have to avoid, and then I just think about hitting my target. There must be some visualizing in there — I'm seeing things I have to avoid, after all — but it's not a conscious act. I just notice them.
I suspect that's part of why so many of us have trouble with target golf. We try to see lines curving through the sky and other things like that. But that may have the same effect as too many words. Perhaps we just need to "see and do." That certainly sounds like what Floyd is suggesting.
Here's an idea: Next time you need to play a shot — say, a low shot — just try swinging the club at an imaginary ball and imagine the ball coming off the face low when you swing. I bet your hands and arms will adjust to create the shot. If you then try to duplicate that shot without an undue amount of thought, you might pull it off. Maybe not the first time, because learning to play by feel comes from practice. But you might be more successful than you expect.
No lines curving through space, no elaborate body positioning. Just pretend you're Bubba. Playing that game on the range might teach you some new things about shotmaking.
Tuesday, March 27, 2018
Charlier Rymer on Controlling Trajectory (Video)
I have in the past posted a tip from Charlie Rymer teaching an easy way to visualize the trajectory of any iron. Today I've got a video showing Charlie's easy method for controlling distance with trajectory.
This is basically a variation of the way you control the length of chips and pitches by changing the length of your swing. But what Charlie is doing is changing the club also, and the combination lets you hit a variety of shots the same distance but with different trajectories.
To me, the beauty of this is that you can use the other tip to figure out what the trajectory with a given club will be, then you just adjust the length of your swing to get the distance you want. And yes, you'll need to practice that on the range; you have to do that any time you learn how to hit one club several distances. But you won't need much practice to get a feel for this method.
And you won't find many simpler ways to control trajectory than this. Thank you, Charlie!
This is basically a variation of the way you control the length of chips and pitches by changing the length of your swing. But what Charlie is doing is changing the club also, and the combination lets you hit a variety of shots the same distance but with different trajectories.
To me, the beauty of this is that you can use the other tip to figure out what the trajectory with a given club will be, then you just adjust the length of your swing to get the distance you want. And yes, you'll need to practice that on the range; you have to do that any time you learn how to hit one club several distances. But you won't need much practice to get a feel for this method.
And you won't find many simpler ways to control trajectory than this. Thank you, Charlie!
Friday, July 28, 2017
Tom Watson on Driving in Crosswinds
The reason I'm posting this article's link is because Tom earned it. After the first round of the Senior Open Championship, you may have seen that Tom was T13 at +1, which isn't bad for a 67-year-old. However, if you didn't watch the coverage, you probably don't know that Tom got the bad side of the draw. They had a lot of wind during the afternoon, but Tom's morning wave played in 40mph winds and sideways rain. When he finished, he was T5 and only two shots back.
Yes, when Tom Watson tells you how to drive it lower in crosswinds, he knows what he's talking about!
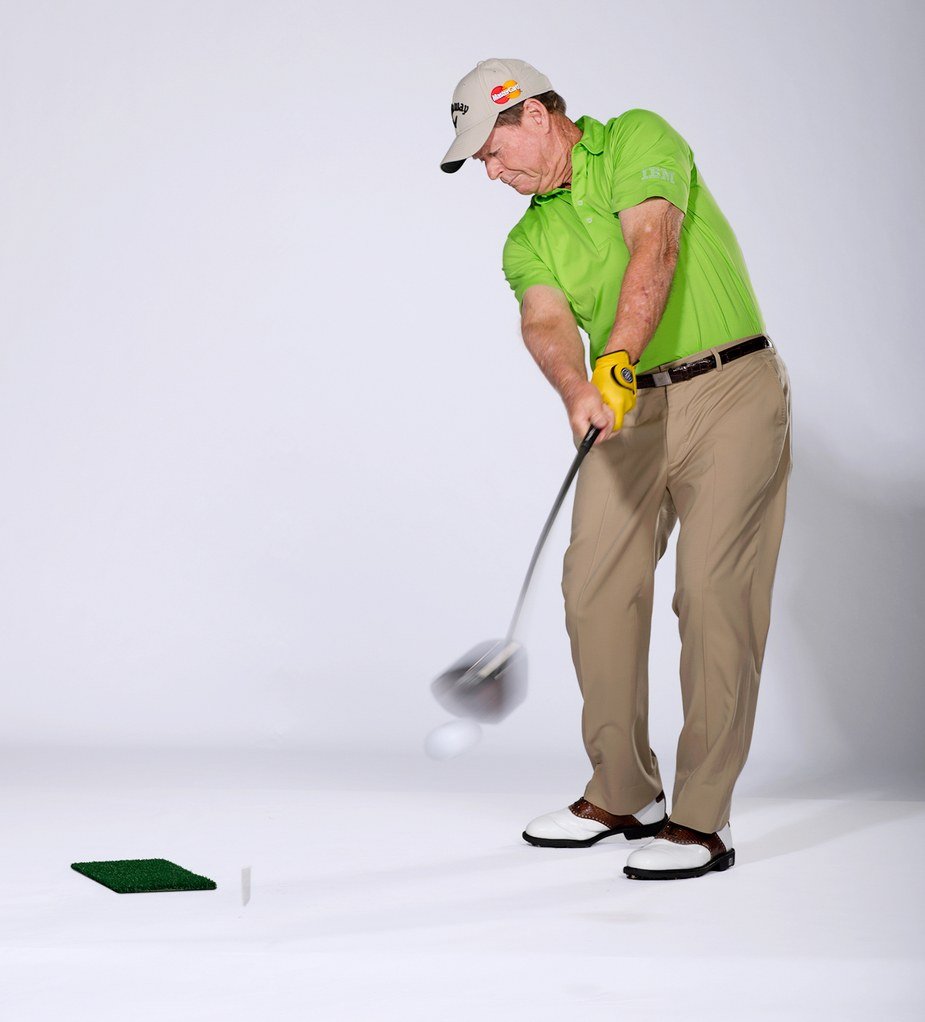
Tom says that you don't want to drive the ball lower in winds unless (1) the ball is going to run a long way or (2) you're in crosswinds. Here's the summary of what he says you should do.
No, really -- you NEED to read the article! Why wouldn't you listen to the master of links golf?
Yes, when Tom Watson tells you how to drive it lower in crosswinds, he knows what he's talking about!
Tom says that you don't want to drive the ball lower in winds unless (1) the ball is going to run a long way or (2) you're in crosswinds. Here's the summary of what he says you should do.
- Tee the ball a half-inch lower and grip down on the club about an inch.
- Shorten your backswing.
- Make sure you're swinging level to the ground when you hit the ball.
No, really -- you NEED to read the article! Why wouldn't you listen to the master of links golf?
Friday, May 26, 2017
Dealing with Conflicting Wedge Advice (Video)
A couple days back, I posted a short game video from Lee Trevino. Lee knows what he's talking about because he has always had a great short game.
But so does Phil Mickelson. And if you watch this slideshow of Phil's chipping at the Golf Digest site, you'll get some different guidance than you will from Lee.
And if you watch this short game video from Golf Digest Best Young Teacher Brandon Stooksbury (the video below), you'll get yet another approach. Who's right? Who's wrong? What's a poor player to do?
Let me give you a few tips to help sort things out.
One thing that I noticed right off is that none of these videos is specific about which short game shot they're teaching! I can tell you that Lee is teaching a pitch shot, and Phil is teaching a flop shot, but Brandon is teaching something midway in-between.
How do I know this, you ask? Because I look for some specific clues in the slideshow and videos. You can look for these things too.
First, if possible, I look for clues about the trajectory of the shot.
Second, you need to note the stance. Lee and Phil both use an open stance, Brandon uses a square stance. (Lee doesn't say his stance is open, but you can see it in the down-the-line shots of both him and Billy Andrade.) If you open your stance, you also have to open the clubface. Otherwise you'll pull all your shots.
Third, check the ball position. Lee says to place it back in your stance, Phil has the ball opposite his lead heel, and Brandon say to place it forward although he actually has the ball just ahead of center, as you can see in the video.
Fourth, you have to check weight distribution at setup. If your weight is more on your lead foot, the ball is probably being played farther forward. With a more balanced weight distribution, the ball position is going to be farther back. Phil has 99% of his weight on his lead foot, according to the text on slide #3. Lee has his weight more on his lead foot, but not nearly as much as Phil. And Brandon's weight is nearly equal on both feet. (You can tell from Lee and Brandon's videos.)
Finally, you have to check how the hands and arms move when compared to the ball position. And this is where it can get tricky. Check these out:
Hope that helps you know what to look for when exploring any new golf techniques.
But so does Phil Mickelson. And if you watch this slideshow of Phil's chipping at the Golf Digest site, you'll get some different guidance than you will from Lee.
And if you watch this short game video from Golf Digest Best Young Teacher Brandon Stooksbury (the video below), you'll get yet another approach. Who's right? Who's wrong? What's a poor player to do?
Let me give you a few tips to help sort things out.
One thing that I noticed right off is that none of these videos is specific about which short game shot they're teaching! I can tell you that Lee is teaching a pitch shot, and Phil is teaching a flop shot, but Brandon is teaching something midway in-between.
How do I know this, you ask? Because I look for some specific clues in the slideshow and videos. You can look for these things too.
First, if possible, I look for clues about the trajectory of the shot.
- I can see that Lee's shot is flying pretty high when he hits it, and I can see that he and Billy are quite a distance away from the green. Lee is also using a lob wedge; I could tell that when I ran the video full screen.
- I can see that Phil's shot is shooting almost straight up in the air (the final slide shows all the pictures in sequence), and the text on the second slide says he's using 60° and 64° wedges.
- I can see that Brandon's shot looks to be flying about the same height as Lee's, but I can see from another section of the video (just keep reading) that he's using a lob wedge like Phil and Lee.
Second, you need to note the stance. Lee and Phil both use an open stance, Brandon uses a square stance. (Lee doesn't say his stance is open, but you can see it in the down-the-line shots of both him and Billy Andrade.) If you open your stance, you also have to open the clubface. Otherwise you'll pull all your shots.
Third, check the ball position. Lee says to place it back in your stance, Phil has the ball opposite his lead heel, and Brandon say to place it forward although he actually has the ball just ahead of center, as you can see in the video.
Let me make a quick note about playing the ball back in an open stance. It sounds funny but, with an open stance, your stance is effectively narrower than the same width in a straight stance, so the ball is actually closer to the middle of your stance. If that doesn't make sense to you, let me know in the comments and I'll do a post to explain it. For now, just take my word.But you can't stop with just knowing the ball position...
Fourth, you have to check weight distribution at setup. If your weight is more on your lead foot, the ball is probably being played farther forward. With a more balanced weight distribution, the ball position is going to be farther back. Phil has 99% of his weight on his lead foot, according to the text on slide #3. Lee has his weight more on his lead foot, but not nearly as much as Phil. And Brandon's weight is nearly equal on both feet. (You can tell from Lee and Brandon's videos.)
Finally, you have to check how the hands and arms move when compared to the ball position. And this is where it can get tricky. Check these out:
- We'll start with Brandon this time. Brandon specifically says not to bend your lead elbow and pull the club across the ball. That's because his stance is square. He lets his arms and shoulders work as a unit, without any manipulation, and the turn of his shoulders provides a very quiet swing where his wrists don't bend forward or back. The weight of the club pulls his hands straight out so his wrists don't flip or bend. He's playing a "straight" shot, and the ball is in the standard mid-stance position for a straight shot.
- Lee is the exact opposite. You can see him bend his lead elbow somewhat dramatically as he swings along the aimline of his open stance, and finishes with his bent lead elbow close to his side. He's "cutting across" the ball.
- And Phil? Although he plays from an open stance, he tries to swing straight down the line for as long as possible. The result is that he actually "chicken-wings" a bit, as you can see in the final slide's swing sequence.
Hope that helps you know what to look for when exploring any new golf techniques.
Saturday, February 25, 2017
Travis Fulton on the Knockdown Wedge (Video)
Here's a tip from instructor and GC regular Travis Fulton on how to hit knockdown wedges. I always like to see new ideas on how to play common shots, but Travis mentions something you may not have heard before.
This idea of not turning your hips fully as you hit the ball goes against everything you normally hear about the golf swing these days, and there's a reason for that.
Most modern instructors have traditionally taught that you want an exaggerated hip drive and less arm action. (That's Hogan's idea.) Belief in that idea, as I have noted in many posts -- over the last few months especially -- has begun to change. To finish your swing without fully releasing your lower body, which is what Travis is teaching here, requires you to use your arms more. You have to swing your arms past your lower body -- and this is actually a natural movement for most people. You just relax your arms and hips a bit, and let your shoulders turn past your hips.
The fact is that most of you do this frequently in your daily life, whether it's sweeping with a broom or simply moving an item from one spot on the table to another. You can learn to do it with a golf club as well; it's mainly a mental thing for most players. You've trained yourself to do it the other way.
As a general rule, you don't want to restrain your hips on your followthrough. But if you reach the point where your arms and shoulders are pulling your hips through to your finish, rather than driving your hips to pull your arms through, you'll probably have fewer back problems going forward.
This idea of not turning your hips fully as you hit the ball goes against everything you normally hear about the golf swing these days, and there's a reason for that.
Most modern instructors have traditionally taught that you want an exaggerated hip drive and less arm action. (That's Hogan's idea.) Belief in that idea, as I have noted in many posts -- over the last few months especially -- has begun to change. To finish your swing without fully releasing your lower body, which is what Travis is teaching here, requires you to use your arms more. You have to swing your arms past your lower body -- and this is actually a natural movement for most people. You just relax your arms and hips a bit, and let your shoulders turn past your hips.
The fact is that most of you do this frequently in your daily life, whether it's sweeping with a broom or simply moving an item from one spot on the table to another. You can learn to do it with a golf club as well; it's mainly a mental thing for most players. You've trained yourself to do it the other way.
As a general rule, you don't want to restrain your hips on your followthrough. But if you reach the point where your arms and shoulders are pulling your hips through to your finish, rather than driving your hips to pull your arms through, you'll probably have fewer back problems going forward.
Friday, July 15, 2016
Martin Hall on Hitting the Stinger (Video)
Since it's Open Week, here's a new School of Golf video on how to hit a stinger, compliments of Martin Hall. Super-simple, easy to follow.
Martin really strips it to the fundamentals here. Three simple keys:
If you find yourself hitting into the wind and/or absolutely have to get your tee shot in the fairway, this is a great shot. Just remember that the ball doesn't fly as far; it gets most of its distance from roll. Make sure there aren't any hazards -- or gorse! -- in your way.
Martin really strips it to the fundamentals here. Three simple keys:
- Tee the ball low. (Yes, use a tee!)
- Play the ball back in your stance a bit. (That's different from most tee shots.)
- Keep your lead wrist bowed at impact. (Watch the video. You still want to 'release' your wrists after impact, because that's the only way you'll get any distance with this shot. But the idea is to delay your release long enough for the shot to launch at a low angle.)
If you find yourself hitting into the wind and/or absolutely have to get your tee shot in the fairway, this is a great shot. Just remember that the ball doesn't fly as far; it gets most of its distance from roll. Make sure there aren't any hazards -- or gorse! -- in your way.
Friday, June 3, 2016
Jordan Spieth's Heart Array Drill
Golf Digest posted this video from Jordan's coach Cameron McCormick demonstrating the "Heart Array" drill. It's a simple concept -- hit six shot shapes that, if you show the flight traces all together, form a heart pattern. And you try to hit the six shapes in as few shots as you can.
Just take a look at the video. It'll all make sense.
The instructions are pretty clear, but I snagged this still from the video; it shows the three ball positions for the various shots. Please note that halfway between Cameron's heels -- the middle of his stance -- is the gap between the back and middle balls. That means the middle ball for the normal (middle trajectory) shot is just ahead of center. It may not work out exactly that way for your swing, but it gives you an idea what position to start with.

It may make you feel better to note that Cameron wasn't able to do the drill very easily either. Just take a look at the traces for his shots as he demonstrates them! You may find it easier to start with just focusing on the fade and draw using the middle ball position -- as he suggests near the end of the video -- and then try to increase the amount of sideways movement. Then you can move on to the varied trajectories.
If nothing else, it will be a good way to break up your normal practice routine with a drill that feels more like a game.
Just take a look at the video. It'll all make sense.
The instructions are pretty clear, but I snagged this still from the video; it shows the three ball positions for the various shots. Please note that halfway between Cameron's heels -- the middle of his stance -- is the gap between the back and middle balls. That means the middle ball for the normal (middle trajectory) shot is just ahead of center. It may not work out exactly that way for your swing, but it gives you an idea what position to start with.
It may make you feel better to note that Cameron wasn't able to do the drill very easily either. Just take a look at the traces for his shots as he demonstrates them! You may find it easier to start with just focusing on the fade and draw using the middle ball position -- as he suggests near the end of the video -- and then try to increase the amount of sideways movement. Then you can move on to the varied trajectories.
If nothing else, it will be a good way to break up your normal practice routine with a drill that feels more like a game.
Thursday, April 28, 2016
Brady Riggs on Hitting a Stinger
Here are Brady Rigg's tips on how to hit a stinger off the tee, from golf.com. Click this link and you can see a video of how to do it. Unfortunately, the site won't let me embed the video.
Brady says you can use a fairway wood, hybrid or long iron for this shot.
Brady says you can use a fairway wood, hybrid or long iron for this shot.
- Stand a half-step closer to the ball. This will help you trap the ball better.
- Grip down on your club. That shortens the club and makes it easier to control.
- Set your stance so your feet are just wider than your hips, not your shoulders.
- Position the ball about an inch back of the center of your stance. Just look at the photo above.
- Tee the ball really low, even level with the ground if you're comfortable doing so. Brady says you can hit it off the ground or even kick up a little mound like Laura Davies does. But I'd go with the low tee, simply because you might as well get the best lie you can get.
- This is the first time I've seen this particular tip, and I'm glad someone finally included it: Instead of gripping the club with the last two or three fingers of your lead hand, grip more tightly with the thumb and forefinger of your trailing hand. When Brady says this is "old school", he means it comes from the days of hickory shafts. He says this will help you square up the clubface, and I agree with that. Just bear in mind that you probably won't be able to hit the ball quite as far, as this is a soft-shaft technique and, unless you're incredibly strong, even a regular flex shaft is much stiffer than they used to use. But since the idea is to hit the fairway and you've already done some things that will reduce your distance, it doesn't matter.
- Finally, cut off the followthrough to help keep the shot low.
Friday, March 11, 2016
Chris O'Connell on Playing in the Wind
I don't know about the rest of you, but we've had quite a bit of wind around here lately. So I dug up this Morning Drive segment on wind play featuring instructor Chris O'Connell, who teaches Matt Kuchar (among others).
The neat thing about this is that O'Connell lists a number of ways you can bring your ball flight down -- that is, lower your trajectory. For example, you can:
One interesting tip he mentions came from Lee Trevino, who told Matt to go to the top of his backswing, take his trailing hand off while keeping his lead wrist cocked, and see if he could touch the clubhead with his trailing hand. If he could, he had too much wrist cock for playing in the wind.
O'Connell also notes that you can move the ball back a bit in your stance and keep your hands a bit forward at impact, BUT he cautions not to depend on those setup things. Rather, you want to use the swing methods because they give you more control over trajectory.
The neat thing about this is that O'Connell lists a number of ways you can bring your ball flight down -- that is, lower your trajectory. For example, you can:
- Flatten your swing plane.
- Shorten your backswing and followthrough. (You can also use a longer club with this method, to make up for lost distance.)
- Use less wrist cock (less hand action, aka swing more like Steve Stricker).
One interesting tip he mentions came from Lee Trevino, who told Matt to go to the top of his backswing, take his trailing hand off while keeping his lead wrist cocked, and see if he could touch the clubhead with his trailing hand. If he could, he had too much wrist cock for playing in the wind.
O'Connell also notes that you can move the ball back a bit in your stance and keep your hands a bit forward at impact, BUT he cautions not to depend on those setup things. Rather, you want to use the swing methods because they give you more control over trajectory.
Tuesday, January 19, 2016
Manuel de la Torre on Hitting High Trajectory Shots
As you know if you follow this blog, I like to post different ways of playing the same shots because everybody's a little different. What's easy for some is hard for others. Having a choice can make the difference between having a shot or chipping out when you hit a bad one.
Altering trajectory is hard for some folks. Of course, for a low shot you can just take a club with less loft and make a shorter swing. And if you need a high shot and it's a shorter shot, you can just take a club with higher loft and hit it full. In neither case do you have to make any setup changes.
But when you need to hit the ball higher than normal and you've got to cover some ground... well, clubs with higher loft don't get as much distance.
When you need a high trajectory shot that travels a long way, you can't cheat. You have to know a technique to do that.
I'm sure you understand the logic of moving the ball a bit forward in your stance, more toward your lead foot. Everybody tells you that. But you need to catch the ball on the upswing to launch the ball higher, and that's the trick, isn't it?
Here's a tip from Manuel de la Torre, who has taught many accomplished players like two-time LPGA major winner Sherri Steinhauer.
Move the ball a bit forward in your stance, just like everybody suggests... but don't place the clubhead behind the ball like you normally would. Address the ball with the clubface about two inches behind the spot where the ball actually is, and then make a normal swing. The bottom of your swing will be at the spot where you would normally take a divot if the ball were at your address location, which means the clubhead will be on its way up when you actually hit the ball.
Yes, you'll need to practice this because you don't want to actually take a divot before you hit the ball with this shot; you just want to graze the top of the ground. But it shouldn't take too much practice to learn how to do that.
And -- added bonus! -- this technique will also help you be a better player in wet conditions, since 'pickers' tend to get better results with any shot when the weather's bad.
Altering trajectory is hard for some folks. Of course, for a low shot you can just take a club with less loft and make a shorter swing. And if you need a high shot and it's a shorter shot, you can just take a club with higher loft and hit it full. In neither case do you have to make any setup changes.
But when you need to hit the ball higher than normal and you've got to cover some ground... well, clubs with higher loft don't get as much distance.
When you need a high trajectory shot that travels a long way, you can't cheat. You have to know a technique to do that.
I'm sure you understand the logic of moving the ball a bit forward in your stance, more toward your lead foot. Everybody tells you that. But you need to catch the ball on the upswing to launch the ball higher, and that's the trick, isn't it?
Here's a tip from Manuel de la Torre, who has taught many accomplished players like two-time LPGA major winner Sherri Steinhauer.
Move the ball a bit forward in your stance, just like everybody suggests... but don't place the clubhead behind the ball like you normally would. Address the ball with the clubface about two inches behind the spot where the ball actually is, and then make a normal swing. The bottom of your swing will be at the spot where you would normally take a divot if the ball were at your address location, which means the clubhead will be on its way up when you actually hit the ball.
Yes, you'll need to practice this because you don't want to actually take a divot before you hit the ball with this shot; you just want to graze the top of the ground. But it shouldn't take too much practice to learn how to do that.
And -- added bonus! -- this technique will also help you be a better player in wet conditions, since 'pickers' tend to get better results with any shot when the weather's bad.
Saturday, October 24, 2015
Going High, Low and Around with Kevin Kisner
Golf Digest posted an article with Kevin Kisner describing how to hit shots around various obstacles. In the article he tells how to hit the ball high, low, hooked and sliced. This video that accompanies the article demonstrates how to hit the ball high.
Now obviously, I can't just copy the article and repost it here -- and that's what I'd have to do, since the article is little more than a summary of the steps you should take to hit each of those shots. But you might find it useful to know how the ball position changes for each of these shots:
But if you take a moment to consider how you would combine these instructions -- for example, to hit a low slice -- you'll realize why most players consider hitting a high draw to be the most difficult shot. You're supposed to move the ball forward to hit it high but back to get the draw. You can't do both!
In order to hit a high draw, you're forced to move the ball forward and hit the draw from there. That greatly increases your chances of hitting the ball fat or thin.
Hopefully Kevin's instructions will help improve your ability to maneuver the ball... and also help you understand why some shots are more difficult for you than others.
Now obviously, I can't just copy the article and repost it here -- and that's what I'd have to do, since the article is little more than a summary of the steps you should take to hit each of those shots. But you might find it useful to know how the ball position changes for each of these shots:
- To hit the ball low, you don't have to change your ball position at all. Just take a longer club and choke down.
- To hit the ball high, you move the ball forward in your stance. Kisner says, "Ball position is crucial. Address it almost like you were hitting a driver, off your front heel." In fact, his instructions sound like a driver setup. As a result, he says weight shift during the downswing is very important if you don't want to hit the ball thin or fat.
- To hook the ball, move the ball just back of the center of your stance.
- To slice the ball, move the ball just forward of the center of your stance.
But if you take a moment to consider how you would combine these instructions -- for example, to hit a low slice -- you'll realize why most players consider hitting a high draw to be the most difficult shot. You're supposed to move the ball forward to hit it high but back to get the draw. You can't do both!
In order to hit a high draw, you're forced to move the ball forward and hit the draw from there. That greatly increases your chances of hitting the ball fat or thin.
Hopefully Kevin's instructions will help improve your ability to maneuver the ball... and also help you understand why some shots are more difficult for you than others.
Tuesday, April 22, 2014
Michael Breed on Trajectory
On The Golf Fix Monday night Michael Breed talked about a number of things, including yet another way to control trajectory when you're hitting the ball off the ground rather than a tee. (The photo came from a YouTube video that doesn't really deal with this problem but the photo will be helpful later.)
The reason this caught my attention is because it doesn't involve changing the ball position!
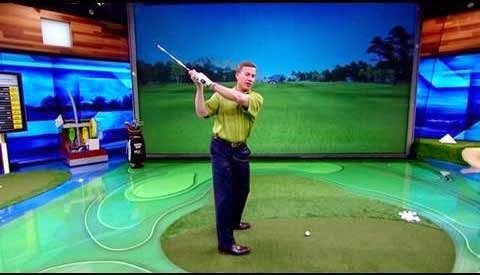
You may have heard of the "reverse K" setup position -- that is, your trailing shoulder is lower than your lead shoulder. Some instructors advise using the "rev-K" for hitting driver and a more level shoulder position for shots on the fairway. Here's a video of Michael explaining why the "rev-K" happens naturally with all clubs (if the video didn't embed correctly, the link to the original is at the end of the post):
BUT -- and this is what Michael talked about Monday night -- you can switch back and forth between the "rev-K" and the "flat shoulder" positions to control your trajectory!
The "rev-K" setup allows you to hit the ball higher because your lead shoulder turns back on a flatter plane, more level with your trailing shoulder. (If you look at the photo up top, you'll see that position.) This lets the club come in more parallel to the ground when you contact the ball. That sends the ball higher because you're using more of the club's loft, not unlike a driver swing which actually swings up on the ball.
With the "flat shoulder" setup position, that lead shoulder would be lower than your trailing shoulder as you make your backswing. When you do that, you have a steeper downswing and hit down on the ball, which makes it fly lower like a chip shot.
Because the "rev-K" moves your head more behind the ball, it has the same effect as if you moved the ball forward in your stance, which is the more traditional way to create a higher trajectory. On the show, Michael hit the ball 5 degrees higher with the "rev-K" setup than with the "flat shoulder" setup when using the same club. Obviously that could vary with different clubs, but you get the idea.
So now you have yet another technique for varying your trajectory. The more options you have, the more likely it is that you'll find one that works consistently for you.
In case the video didn't embed properly, here's the link to the video at golfchannel.com.
The reason this caught my attention is because it doesn't involve changing the ball position!
You may have heard of the "reverse K" setup position -- that is, your trailing shoulder is lower than your lead shoulder. Some instructors advise using the "rev-K" for hitting driver and a more level shoulder position for shots on the fairway. Here's a video of Michael explaining why the "rev-K" happens naturally with all clubs (if the video didn't embed correctly, the link to the original is at the end of the post):
BUT -- and this is what Michael talked about Monday night -- you can switch back and forth between the "rev-K" and the "flat shoulder" positions to control your trajectory!
The "rev-K" setup allows you to hit the ball higher because your lead shoulder turns back on a flatter plane, more level with your trailing shoulder. (If you look at the photo up top, you'll see that position.) This lets the club come in more parallel to the ground when you contact the ball. That sends the ball higher because you're using more of the club's loft, not unlike a driver swing which actually swings up on the ball.
With the "flat shoulder" setup position, that lead shoulder would be lower than your trailing shoulder as you make your backswing. When you do that, you have a steeper downswing and hit down on the ball, which makes it fly lower like a chip shot.
Because the "rev-K" moves your head more behind the ball, it has the same effect as if you moved the ball forward in your stance, which is the more traditional way to create a higher trajectory. On the show, Michael hit the ball 5 degrees higher with the "rev-K" setup than with the "flat shoulder" setup when using the same club. Obviously that could vary with different clubs, but you get the idea.
So now you have yet another technique for varying your trajectory. The more options you have, the more likely it is that you'll find one that works consistently for you.
In case the video didn't embed properly, here's the link to the video at golfchannel.com.
Wednesday, March 19, 2014
Monty on Trajectory
I'm always on the lookout for new ways of making the basics easier to use, and today I have a really unique approach to trajectory. In fact, it's so simple that I'm amazed I didn't stumble across it sooner.
I am a great believer that controlling trajectory is more important that controlling shot shape. I know that goes against what a lot of instructors teach but as long as you can hit one consistent shot shape, you can play most courses. You may have to lay up at a sharp dogleg that bends the wrong way for your shot shape. Big deal -- that's easy enough to do.
However, unless you can hit your shot higher or lower when you need to, you won't be able to hit under trees or over obstacles. You won't be able to keep the ball low into a wind or hit it high to take advantage of a tailwind. In my book, controlling trajectory is the more useful skill.
On Tuesday night's Golf Channel Academy Colin Montgomerie had an amazingly simple approach to trajectory that you can use RIGHT NOW, without any practice whatsoever. I was blown away by the simplicity of it.

Are you ready for this?
And it follows that when you're hitting downwind you'll hit the full shot, and when you're hitting into the wind you'll hit the knockdown shot.
Here's an interesting fact: When hitting into the wind, Monty pointed out that the knockdown shot will travel farther than the full shot even if you use the same club with both shots. That's because the extra spin on the full shot will cause the ball to balloon into the air and fall short.
And do you want to know what makes this such an incredible tip? In order to adjust your trajectory this way, you don't have to alter your setup or ball position one little bit! You just set up normally and hit your full or knockdown shot.
Like I said, it's dirt simple and almost foolproof. What more can you ask for from a golf tip? Thank you, Monty!
I am a great believer that controlling trajectory is more important that controlling shot shape. I know that goes against what a lot of instructors teach but as long as you can hit one consistent shot shape, you can play most courses. You may have to lay up at a sharp dogleg that bends the wrong way for your shot shape. Big deal -- that's easy enough to do.
However, unless you can hit your shot higher or lower when you need to, you won't be able to hit under trees or over obstacles. You won't be able to keep the ball low into a wind or hit it high to take advantage of a tailwind. In my book, controlling trajectory is the more useful skill.
On Tuesday night's Golf Channel Academy Colin Montgomerie had an amazingly simple approach to trajectory that you can use RIGHT NOW, without any practice whatsoever. I was blown away by the simplicity of it.
Are you ready for this?
- When you need a high trajectory, hit your normal full shot. The spin imparted to the ball will make it go high.
- When you need a low trajectory, hit a shot at less than full power -- in other words, hit a knockdown shot. You won't get as much spin on the ball so it will fly lower.
And it follows that when you're hitting downwind you'll hit the full shot, and when you're hitting into the wind you'll hit the knockdown shot.
Here's an interesting fact: When hitting into the wind, Monty pointed out that the knockdown shot will travel farther than the full shot even if you use the same club with both shots. That's because the extra spin on the full shot will cause the ball to balloon into the air and fall short.
And do you want to know what makes this such an incredible tip? In order to adjust your trajectory this way, you don't have to alter your setup or ball position one little bit! You just set up normally and hit your full or knockdown shot.
Like I said, it's dirt simple and almost foolproof. What more can you ask for from a golf tip? Thank you, Monty!
Tuesday, February 11, 2014
Michael Breed on HItting into the Wind
I've posted material on hitting knockdown shots before, but this tip from Michael Breed has some info you don't normally get. He covered this during The Golf Fix on Monday night, and they posted a short version at golfchannel.com:
Let me pick out the extra info Michael has here (and some things he mentioned on the regular show):
Let me pick out the extra info Michael has here (and some things he mentioned on the regular show):
- Michael specifically says you should pick out a club that is either (a) two clubs longer or (b) 20 yards longer than you would normally use. However, he's demonstrating this on the 7th hole at Pebble Beach, a DOWNHILL shot. Note that he says you can go three clubs longer; on the show he actually said the three-club guideline might be better for a downhill shot to further minimize the time the ball spends in the air. That's an important piece of information to have!
- Note also that not getting enough lower body action or shoulder turn can cause this shot to slice badly. You need to keep your lower body relaxed so it can move normally and help you square up the club face. This is important even on approach shots that you aren't playing into the wind. If you just maintain the connection between your upper arms and your chest (which I've talked about a lot on this blog) you'll make the proper moves automatically.
- He also mentions using an abbreviated backswing and followthrough to keep the ball down, and this is important when hitting any kind of knockdown shot. On the show he specifically mentioned keeping your hands at shoulder level or below. You can see this in the video as well.
Saturday, November 2, 2013
Hitting the "Under Over" Shot
Another tip from over at the golftipsmag.com site. I've talked about hitting knockdown shots several times, but I found this cool video that not only demonstrates the technique but also includes tips for things like choosing the right club to keep the ball low. (In case you need to keep it under tree branches, for instance.)
Here's PGA teacher Jeff Johnson with the demonstration:
Here's the big key, folks: You aren't swinging out of your shoes trying to hit the ball hard. You're taking more club than normal -- at least one or two clubs, according to Jeff. You're keeping your weight forward, more on your lead leg -- that forces you to hit down on the ball. And you make a shorter backswing and finish, which makes you generate less backspin so the ball stays lower.
A knockdown shot often makes more sense than a full shot, even when you can make the full shot without trouble, simply because it's a more controlled shot. But knowing how to hit the knockdown is critical when you have to keep the ball low.
And don't forget -- you can also get an idea which club will give you the right trajectory by using this tip that came from GC's Charlie Rymer. It's so simple that I'm amazed more teachers don't teach it.
Here's PGA teacher Jeff Johnson with the demonstration:
Here's the big key, folks: You aren't swinging out of your shoes trying to hit the ball hard. You're taking more club than normal -- at least one or two clubs, according to Jeff. You're keeping your weight forward, more on your lead leg -- that forces you to hit down on the ball. And you make a shorter backswing and finish, which makes you generate less backspin so the ball stays lower.
A knockdown shot often makes more sense than a full shot, even when you can make the full shot without trouble, simply because it's a more controlled shot. But knowing how to hit the knockdown is critical when you have to keep the ball low.
And don't forget -- you can also get an idea which club will give you the right trajectory by using this tip that came from GC's Charlie Rymer. It's so simple that I'm amazed more teachers don't teach it.
Sunday, September 29, 2013
Playing a Sidehill Downhill Lie
I found this neat video over at golftipsmag.com. PGA teaching pro Jeff Johnson left this video with a very simple tip to improve your shots from a sidehill lie.
This is really simple, folks; it's all about posture. While this lie requires you to bend your knees a bit more -- so you can get down closer to the ball -- you have to make sure that you don't "sit back" into the hill too much. If you do, you'll end up swinging too flat, too much along the line of the slope, and that will make it hard to get the ball up in the air. If you don't get it up in the air, you aren't going to hit it very far!
On the other hand, you don't have to lean toward the ball so much that you lose your balance. Just make sure that you lean forward enough to get an upright swing. That's how you dig down and make solid contact with the ball.
Don't forget that the ball is going to curve down along the side of the slope. (That's a slice, no matter whether you're a leftie or a rightie. They included a trace of the ball's flight near the end of the video. See how much it curved?) You'll probably need to aim more uphill so the ball doesn't curve into even worse trouble.
This is really simple, folks; it's all about posture. While this lie requires you to bend your knees a bit more -- so you can get down closer to the ball -- you have to make sure that you don't "sit back" into the hill too much. If you do, you'll end up swinging too flat, too much along the line of the slope, and that will make it hard to get the ball up in the air. If you don't get it up in the air, you aren't going to hit it very far!
On the other hand, you don't have to lean toward the ball so much that you lose your balance. Just make sure that you lean forward enough to get an upright swing. That's how you dig down and make solid contact with the ball.
Don't forget that the ball is going to curve down along the side of the slope. (That's a slice, no matter whether you're a leftie or a rightie. They included a trace of the ball's flight near the end of the video. See how much it curved?) You'll probably need to aim more uphill so the ball doesn't curve into even worse trouble.
Subscribe to:
Posts (Atom)